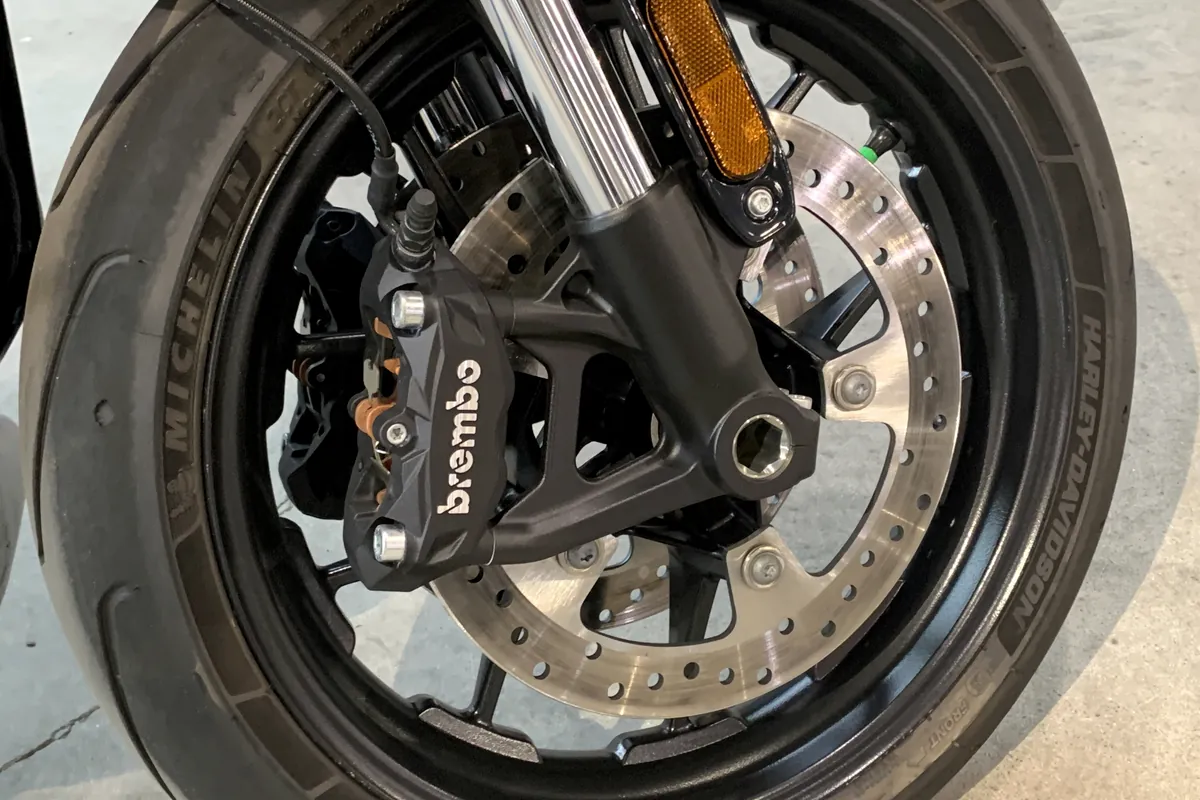
Brake pads are consumables, but the job is safety-critical. A pad fitted backwards, a piston pushed in with the reservoir full, or a caliper bolt left loose can cause a failure. If you are unsure at any step, stop and use a workshop.
At a glance
| Item | Check | Risk if missed |
|---|---|---|
| Pads | Correct compound and fitment | Poor braking or rapid wear |
| Disc | Thickness, scoring, heat tint | Noise, vibration, reduced performance |
| Pistons | Free movement and seals | Drag or brake fade |
| Caliper bolts | Correct torque | Caliper movement or loss |
| Fluid | Level and condition | Spongy lever or brake failure |
| Bedding-in | Follow the pad maker's procedure | Weak initial braking |
Tools and parts
You need the correct pads, a socket set, a torque wrench, a piston-press tool or a clean lever, brake cleaner, a brush, a fluid reservoir cloth and new caliper bolts if the manufacturer specifies them. A service manual for the model is essential.
Check the pad compound and fitment. Road pads, sintered pads and ceramic pads behave differently. Use the specification for your bike and your use. Do not fit racing pads to a commuter without understanding the heat range.
Precautions
Brake dust can be harmful. Do not blow it with compressed air. Use a damp cloth or a sealed extractor. Wear gloves and eye protection. Brake fluid damages paint; cover the surrounding bodywork and wipe spills immediately.
Support the bike securely. Do not let the caliper hang by the brake hose; the hose can be damaged. Do not open the reservoir cap until you have checked the fluid level, and never let the reservoir overflow when the pistons are pushed back.
Remove the old pads
Loosen the caliper mounting bolts before lifting the bike, then support it and remove the caliper. Take out the pad retaining pin or clip and lift the pads out. Note the orientation of any shims or springs.
Inspect the disc for scoring, deep grooves or a blue heat tint. Measure the disc thickness if you have the tool. A disc below the minimum thickness or badly scored should be replaced, not just fitted with new pads.
Fit the new pads
Clean the caliper with brake cleaner and a soft brush. Push the pistons back slowly and squarely. If the pistons are stiff or corroded, the caliper needs a rebuild, not a pad change. Check the dust seals.
Fit the new pads with the correct shims and springs. Refit the caliper and torque the mounting bolts to the specification. Pump the brake lever until the pads contact the disc and the lever feels firm. Check the fluid level and top up if necessary.
Bed in and test
Bed in the pads according to the manufacturer's procedure. Usually this means a series of moderate stops from a moderate speed, allowing the brakes to cool between cycles. Avoid hard stops from high speed until the pads are bedded.
Test the brakes at low speed before riding normally. Check for drag, noise, a spongy lever or a pulling sensation. Recheck the caliper bolts and the fluid level after the first ride.
When to book the workshop
Book a workshop if the pistons are seized, the disc is worn, the brake fluid is contaminated, the lever is spongy or you are not confident in the torque figures. A brake failure is not a learning opportunity on a public road.
If the pedal or lever still feels soft after bleeding, there may be air in the system or a failing master cylinder. Do not ride until the brake is firm and consistent.
The bottom line
The pad change is only half the job. Inspect the disc, free the pistons, torque the caliper and bed in the pads. If the lever is spongy or the pistons are seized, stop and book the workshop. Brakes are not a place to learn by trial.IndoBikes workshop
Checklist
- Read the service manual and confirm the pad specification.
- Support the bike and remove the caliper.
- Inspect the disc and caliper pistons.
- Clean the caliper without compressed air.
- Push the pistons back slowly.
- Fit the pads with the correct shims and springs.
- Torque the caliper bolts.
- Pump the lever and check the fluid level.
- Bed in the pads and test at low speed.
Questions
Can I change brake pads myself?
Yes, if you have the correct tools, the service manual and the confidence to torque the caliper bolts and bed in the pads. If the pistons are seized or the disc is worn, use a workshop.
Do I need to bleed the brakes after a pad change?
Not usually, if you did not open the hydraulic system. If the lever feels spongy or you opened the system, bleed it with the specified fluid.
Why do my new brake pads feel weak?
New pads need bedding in. If they still feel weak after the bedding procedure, check for contaminated pads, a glazed disc, air in the system or a seized caliper.